Archive

Tag Archives: recipe

Potato and Salmon Cakes with Ginger and Scallions

I found this recipe in the March 2012 issue of Food and Wine magazine and adapted it to my own liking.  I don’t care for crab or salmon cakes with too much filler where you lose the taste of what I believe should be the main ingredient…the seafood!  I also used leftover salmon that I had baked the night before for dinner.  If you’re using raw salmon from scratch, the directions are below otherwise skip to step 2.

MAKES 12 SMALL CAKES

Ingredients

  • 1 pounds medium red-skinned potatoes, scrubbed
  • Sea salt
  • 1 pound skinless wild salmon fillet
  • Safflower or sunflower oil, for greasing and frying
  • Freshly ground pepper
  • 1 bunch scallions (about 6 scallions), coarsely chopped
  • 3 large eggs, lightly beaten
  • 3 garlic cloves, minced
  • 2 1/2 tablespoons minced fresh ginger
  • 1/2 medium red onion, finely chopped
  • 1 1/2 tablespoon tamari
  • 1 tablespoon toasted sesame oil
  • Dill Sauce, for serving

Directions

Preheat the oven to 350°. In a large saucepan, cover the potatoes with water. Add a large pinch of sea salt and bring to a boil. Simmer over moderately high heat until the potatoes are tender, about 20 minutes. Drain and let cool slightly, then peel. Transfer the potatoes to a large bowl and mash.

Meanwhile, put the salmon on a lightly oiled rimmed baking sheet and season with salt and pepper. Bake for about 15 minutes, until the salmon is medium-rare inside.

Gently flake the salmon and add it to the potatoes along with the scallions, eggs, garlic, ginger, onion, tamari and sesame oil. Mix well, then season with salt.

Form the potato mixture into fourteen 1/2-cup patties.

In a large nonstick skillet, heat 1/4 inch of safflower or sunflower oil until shimmering. Working in batches, fry the potato cakes over moderately high heat until browned and crisp, about 2 minutes per side. Transfer to a large baking sheet. Repeat with the remaining potato cakes, adding more oil and adjusting the heat as necessary.

Bake the salmon cakes for about 15 minutes, until heated through.

Serve with the Dill Sauce and enjoy!

Pasta with Robiola and Truffles

Oh lordy was this divine!  Rich?  Yes!  Indulgent?  Yes!  Worth the calories?  Heck yes!!!  I was lucky enough to receive 6oz of fresh Oregon black truffles from my sister-in-law and her husband for Christmas this year and wanted to find a worthy recipe to use them in.  We were hosting some people for dinner and the Seahawks game (GO HAWKS!!!) and this seemed like the perfect comfort food meal for the occasion.  I wasn’t able to find Robiola but the cheesemonger recommended Double Cream Cremont which was a great substitution.

4 FIRST COURSE SERVINGS

Ingredients

  • 4 tablespoons salted butter
  • 8 ounces dried egg fettuccine or tagliatelle
  • 8 ounces Robiola Rocchetta cheese, at room temperature, cut into 1-inch pieces
  • Salt and freshly ground pepper
  • 1 medium fresh white or black truffle, peeled and sliced, or one 2-ounce jar sliced truffles

Preparation

Bring a large pot of salted water to a boil. In a small saucepan, melt the butter. Cook over moderate heat until the milk solids turn a rich brown and the butter smells nutty, about 6 minutes. Pour the butter into a bowl.

Cook the pasta in the boiling water until al dente. Drain the pasta, reserving 1/2 cup of the cooking water. Return the pasta to the pot. Add the reserved water and the browned butter and toss with 2 forks. Add the cheese and toss until it begins to melt; season with salt and pepper. Transfer the pasta to warmed bowls, shave the truffle on top and serve right away.

IMG_4828IMG_4830


Joe Jack’s Red Snapper

I blogged about Joe Jack’s Fish Shack in Puerto Vallarta because of this dish.  Every time I go down there this is #1 on my list of things to eat.  It’s so fresh, full of flavor and light at the same time.  Hands down one of my favorite dishes and now I have the recipe for myself thanks to the oh-so-friendly owner who had no hesitation in giving it to me the last time I was down there (thank you!).  And now I’m sharing it with you!

Each fish serves about 2

Ingredients

  • 1.5 -2 lb red snapper or other whole fish (scaled and gutted, very important)
  • 1-2 teaspoons of “huacho salt”
  • 4 Tablespoons of slivered garlic olive oil
  • 5-8 cloves of garlic poached in butter
  • 5-7 whole dry chile de arbol
  • 2 Tablespoons fresh squeezed lime juice

Huacho salt

  • 2 Tablespoons fennel seeds
  • 1 Tablespoon coriander seeds
  • 1 Tablespoon cumin seeds
  • 2 Tablespoons whole black pepper
  • 5 ea. Clove
  • 1 stick cinnamon (broken)
  • 4 chile de arbol (seeds o.k.)
  • 12 Tablespoons kosher or sea salt

yields about 1 ½ cups

Directions

Huacho Salt:

Toast all spices except salt and black peppercorns in a sauté pan on very low heat until smoking. Let cool and add black peppercorns. Grind in a spice grinder (coffee grinder) or blender or morder and pestle. Combine with the salt.

You can save and use this on anything. It will add a great interesting flavor to anything you can imagine.

Poached garlic:

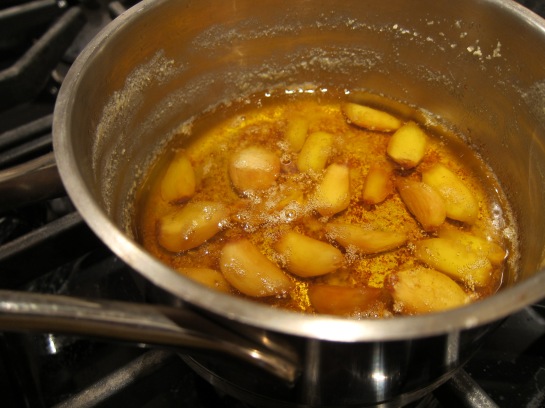
IMG_6782To poach the garlic, slowly heat butter (enough to cover) and garlic cloves until cloves  just give to the touch. You can do more of this as well and just keep it in the fridge to use later in the week, but not too long as it will get rancid.

Whole Red Snapper:

IMG_6787Score the fish three or four times (or more if its bigger fish) on each side and liberally season with the salt mixture. Liberally douse the fish with the slivered garlic oil on one side and place on a medium temperature griddle or grill or large sauté pan or even a baking dish (preheat oven to 425˚F if using oven method), again liberally slather the top side with the same.  (feel free to stuff the fish with garden herbs and lemon or lime and if it’s a bigger fish also liberally salt the inside of cavity as well)

Place on griddle or grill or sauté pan on one side and cover. If its in an oven do not cover (cook for approx. 30 mins, 15 mins on each side or when done).

When fish is about half done on topside, flip the fish to the other side and cover again.

When the “new” topside is just cooked or rather almost cooked to the bone (the scores let you peek). You are pretty assured that the downside is also done.

Note:  an important thing to remember is that over cooked fish is way worse than under cooked fish. Most likely the residual heat from the cooking, will continue cooking the fish at the bone.

Place the fish on a serving platter.

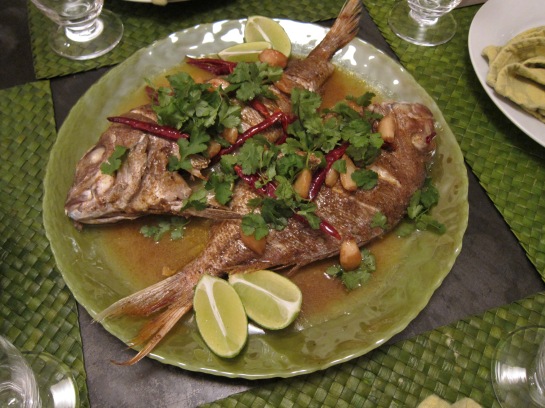
IMG_6794In a separate hot sauté pan, put in the butter and poached garlic, a pinch of salt, and four or five more whole chilies. When the butter starts to brown, add the lime juice, and pour it all over the fish.  Garnish with fresh cilantro leaves, lime halves, and serve with fresh tortillas and beans and rice.

Stuffed Acorn Squash with Quinoa and Pistachios

I was given this recipe by my trainer and nutritionist – Breanne Curran at the Magnuson Athletic Club – and served it the other night to my girlfriends as a healthy dinner option for the night after Thanksgiving.  It’s hearty and filling while at the same time “light”.  She recommends subbing the feta with nutritional yeast (mild, nutty flavor) for those that are vegans.

Serves 8

Ingredients

  • 4 small acorn squash, halved and seeds removed
  • 4 tablespoons extra-virgin olive oil
  • Coarse salt and freshly ground pepper
  • 1 cup quinoa, rinsed
  • 1/2 cup chopped fresh parsley
  • 1/2 cup feta, crumbled
  • 1/2 cup roasted, salted pistachios, chopped
  • 2 teaspoons red-wine vinegar
  • Pinch red-pepper flakes

Directions

Heat oven to 425ª F.  Brush squash with 2 tablespoons oil and season with salt and pepper.  Roast cut side down on two baking sheets until tender and caramelized, 20 to 25 minutes.

Meanwhile, bring quinoa and 2 cups water to boil in a small pot.  Reduce heat and simmer, covered, until tender and water is absorbed, about 15 minutes.  OR – cook quinoa in a rice cooker according to directions.  Let cool, then fluff with a fork.  In a large bowl, combine quinoa, parsley, feta, pistachios, remaining 2 tablespoons oil, and vinegar.  Season with salt and red-pepper flakes.  Divide filling among squash and serve.


Pancetta, White Bean and Swiss Chard Pot Pies


From The Smitten Kitchen Cookbook

One of the food blogs I love to follow is the Smitten Kitchen.  If you’re not familiar with it be sure to check it out.  Written by Deb Perelman, a wife and mother of one, she manages to make incredible food out of her teenie NYC apt which is even more inspiring!   I recently came across this incredibly delicious comforting winter recipe and couldn’t wait to make it.  It was unanimously a hit and I’m looking forward to making it again…possibly with some sausage added to make it even more hearty.  You can easily omit the pancetta to make it vegetarian.

Serves 4

Lid

  • 2 cups (250 grams) all- purpose flour
  • 1/2 teaspoon table salt
  • 13 tablespoons (185 grams or 1 stick plus 5 tablespoons) cold unsalted butter, diced
  • 6 tablespoons (90 grams) sour cream or whole Greek yogurt (i.e., a strained 
yogurt)
  • 1 tablespoon (15 ml) white wine vinegar
  • 1/4 cup (60 ml) ice water
  • 1 egg, beaten with 1 tablespoon water, for egg wash

Filling

  • 2 tablespoons (30 ml) olive oil
  • 4 ounces (115 grams or 3/4 to 1 cup) 1/4-inch-diced pancetta
  • 1 large or 2 small onions, finely chopped
  • 1 large carrot, finely chopped
  • 1 large stalk celery, finely chopped
  • Pinch of red pepper flakes
  • Salt and freshly ground black pepper
  • 2 garlic cloves, minced
  • Thinly sliced Swiss chard leaves from an 8- to 10-ounce (225- to 285-gram)
 bundle (4 cups); if leaves are very wide, you can halve them lengthwise
  • 3 1/2 tablespoons (50 grams) butter
  • 3 1/2 tablespoons (25 grams) all- purpose flour
  • 3 1/2 cups (765 ml) sodium- free or low- sodium chicken or vegetable broth
  • 2 cups white beans, cooked and drained, or from one and a third 15.5- ounce 
(440-gram) cans

Make lids:

In a large, wide bowl (preferably one that you can get your hands into), combine the flour and salt. Add the butter and, using a pastry blender or your fingertips, cut them up and into the flour mixture until it resembles little pebbles. Keep breaking up the bits of butter until the texture is like uncooked couscous.

In a small dish, whisk together the sour cream, vinegar, and water, and combine it with the butter-flour mixture. Using a flexible spatula, stir the wet and the dry together until a craggy dough forms. If needed, get your hands into the bowl to knead it a few times into one big ball. Pat it into a flattish ball, wrap it in plastic wrap, and chill it in the fridge for 1 hour or up to 2 days.

Make filling:

Heat 1 tablespoon olive oil over medium- high heat in a large, wide saucepan, and then add the pancetta. Brown the pancetta, turning it frequently, so that it colors and crisps on all sides; this takes about 10 minutes. Remove it with a slotted spoon, and drain it on paper towels before transferring to a medium bowl. Leave the heat on and the renderings in the pan. Add an additional tablespoon of olive oil if needed and heat it until it is shimmering. Add onions, carrot, celery, red pepper flakes, and a few pinches of salt, and cook over medium heat until the vegetables are softened and begin to take on color, about 7 to 8 minutes.

Add the garlic, and cook for 1 minute more. Add the greens and cook until wilted, about 2 to 3 minutes. Season with the additional salt and freshly ground black pepper to taste. Transfer all of the cooked vegetables to the bowl with the pancetta, and set aside.
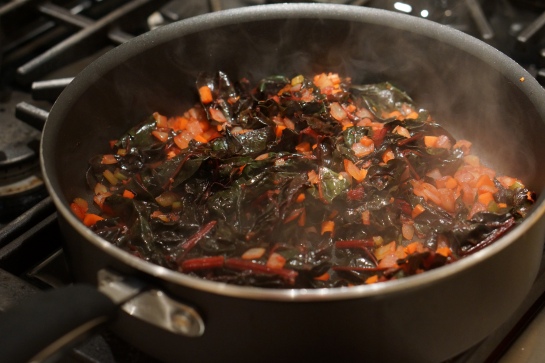
Make sauce:

Wipe out the large saucepan; don’t worry if any bits remain stuck to the bottom. Then melt the butter in the saucepan over medium- low heat. Add the flour, and stir with a whisk until combined. Continue cooking for 2 minutes, stirring the whole time, until it begins to take on a little color. Whisk in the broth, one ladleful at a time, mixing completely between additions. Once you’ve added one- third of the broth, you can begin to add the rest more quickly, two to three ladlefuls at a time; at this point you can scrape up any bits that were stuck to the bottom — they’ll add great flavor.

Once all of the broth is added, stirring the whole time, bring the mixture to a boil and reduce it to a simmer. Cook the sauce until it is thickened and gravylike, about 10 minutes. Season with salt and pepper. Stir the white beans and reserved vegetables into the sauce.

Preheat your oven to 375 degrees.

Assemble and cook pot pies:

Divide the filling between four ovenproof 2-cup bowls. (You’ll have about 1 1/2 cups filling in each.) Set the bowls on a baking pan.

Divide the dough into four pieces, and roll it out into rounds that will cover your bowls with an overhang, or about 1 inch wider in diameter than your bowls. Whisk the egg wash and brush it lightly around the top rim of your bowls (to keep the lid glued on; nobody likes losing their lid!) and drape the pastry over each, pressing gently to adhere it. Brush the lids with egg wash, then cut decorative vents (small as they led to lots of draping) in each to help steam escape.

Bake until crust is lightly bronzed and filling is bubbling, about 30 to 35 minutes.

Do ahead:

The dough, wrapped twice in plastic wrap and slipped into a freezer bag, will keep for up to 2 days in the fridge, and for a couple months in the freezer. The filling can be made up to a day in advance and stored in a covered container in the fridge.

Saag Paneer

I came across this particular recipe in the September & October 2012 issue of Cook’s Illustrated.  I’ve been on an Indian kick lately and for some reason was craving this for dinner.  I’ve made a different version of it before and found it to be pretty simple and straight forward.  Paneer cheese is honestly THE easiest cheese I’ve ever made.  Anyone can do it!  Just be sure to watch your pot and avoid scorching the bottom of it (like I did this time around which took many washes to finally come clean and look somewhat normal).  This dish is perfect over basmati rice with some warmed up naan on the side.

Serves 4 to 6

Ingredients

Cheese (Paneer)

  • 3 quarts whole milk
  • 3 cups buttermilk
  • 1 tablespoon salt

Spinach Sauce (Saag)

  • 1 (10 ounce) bag curly-leaf spinach, rinsed
  • 3/4 lb mustard greens, stemmed and rinsed
  • 3 Tbsp unsalted butter
  • 1 tsp cumin seeds
  • 1 tsp ground coriander
  • 1 tsp paprika
  • 1/2 tsp ground cardamom
  • 1/4 tsp ground cinnamon
  • 1 onion, chopped finely
  • Salt and pepper
  • 3 garlic cloves, minced
  • 1 Tbsp grated fresh ginger
  • 1 jalapeño chile, stemmed, seeded, and minced
  • 1 (14.5 ounce) can diced tomatoes, drained and chopped coarse
  • 1/2 cup roasted cashews, chopped coarse
  • 1 cup water
  • 1 cup buttermilk
  • 3 Tbsp chopped fresh cilantro

Cheese

Line a colander with a triple layer of cheesecloth and set in sink.  Bring milk to a boil in a Dutch oven over medium-high heat.

Whisk in buttermilk and salt, turn off heat, and let stand for 1 minute.  Pour milk mixture through cheesecloth and let curds drain for 15 minutes.

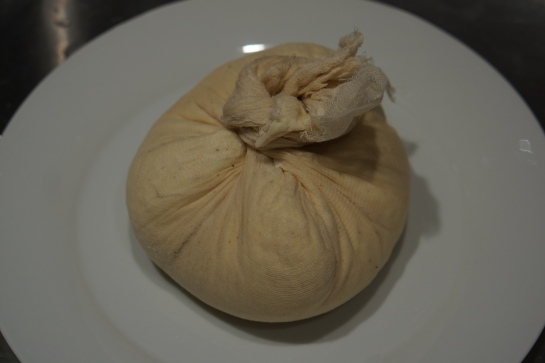
Pull edges of cheesecloth together to form pouch.

Twist edges of cheesecloth together, firmly squeezing out as much liquid as possible from cheese curds.  Place taut, twisted cheese pouch between 2 large plates and weigh down top plates with heavy Dutch oven.  Set aside at room temperature until cheese is firm and set, at least 45 minutes.

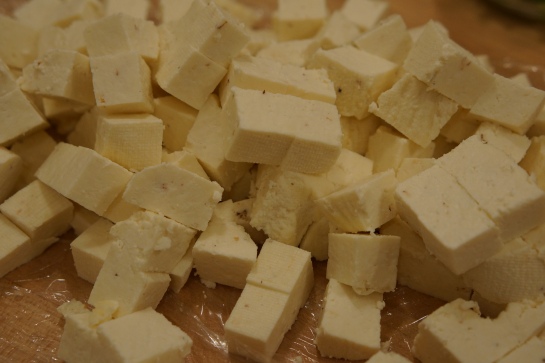
Remove cheesecloth and cut cheese into 1/2-inch pieces.  (Left uncut, cheese can be wrapped in plastic wrap and refrigerated for up to 3 days.)

Spinach Sauce

Place spinach in large microwave-safe bowl, cover, and microwave until wilted, about 3 minutes.  When cool enough to handle, chop enough spinach to measure 1/3 cup and set aside.  Transfer remaining spinach to blender and wipe out bowl.  Place mustard greens in now-empty bowl, cover, and microwave until wilted, about 4 minutes.  When cool enough to handle, chop enough mustard greens to measure 1/3 cup and transfer to bowl with chopped spinach.  Transfer remaining mustard greens to blender.

Meanwhile, melt butter in 12-inch skillet over medium-high heat.  Add cumin seeds, coriander, paprika, cardamom, and cinnamon and cook until fragrant, about 30 seconds.  Add onion and 3/4 teaspoon salt; cook, stirring frequently, until softened, about 3 minutes.

Add garlic, ginger, and jalapeño; cook, stirring frequently, until lightly browned and just beginning to stick to pan, 2 to 3 minutes.  Stir in tomatoes and cook mixture until pan is dry and tomatoes are beginning to brown, 3 to 4 minutes.  Remove skillet from heat.

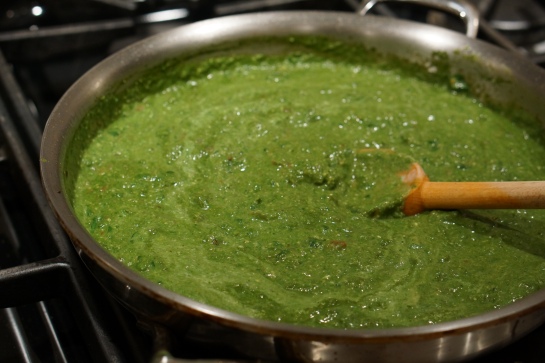
Transfer half of onion mixture to blender with greens.  Add half of cashews and water; process until smooth, about 1 minute.  Return purée to skillet.

Return skillet to medium-high heat, stir in chopped greens and buttermilk, and bring to a simmer.

Reduce heat to low, cover, and cook until flavors have blended, 5 minutes.  Season with salt and pepper to taste.  Gently fold in cheese cubes and cook until just heated through, 1 to 2 minutes.

Transfer to serving dish, sprinkle with remaining cashews and cilantro, and serve.

Oven-baked Spicy Brussels Sprouts Crumble and Sour Cream Curry

I was in need of a good vegetable side to serve with my Baked Fish recipe that I was serving to friends  for dinner and came across this recipe in my Vij’s At Home cookbook and have now found a new favorite.  It’s a fairly simple recipe and doesn’t require too much time or focus (which is a plus when multi-tasking in the kitchen:)).  While the Brussels sprouts are baking, start the curry and voila!  You’ve got yourself a damn tasty side dish that everyone’s going to want seconds of!

Serves 6

Ingredients

Baked Brussels Sprouts

  • 1 1/2 lbs Brussels sprouts, cut in 1/2-inch dice
  • 2 Tbsp ground cumin
  • 1/2 Tbsp salt
  • 1/2 tsp crushed cayenne pepper (optional)
  • 2 tsp mango powder (I couldn’t find this in my local grocery store so I omitted it)
  • 1 Tbsp cooking oil

Sour Cream Curry

  • 1/2 cup sour cream
  • 1/2 buttermilk
  • 1/3 cup cooking oil
  • 1 cup  chopped onion (1 medium)
  • 2 Tbsp finely chopped garlic (6 medium cloves)
  • 2 cups puréed tomatoes (4 medium, or canned is fine, but not crushed)
  • 2 Tbsp ground yellow mustard seeds (optional0
  • 1 tsp ground cayenne pepper (optional)
  • 2 tsp salt
  • 1 1/2 Tbsp garam masala or ground cumin
  • 1 tsp ground fenugreek seeds (optional)
  • 3 1/2 cups water

Directions

Baked Brussels Sprouts

Preheat the oven to 400ªF.

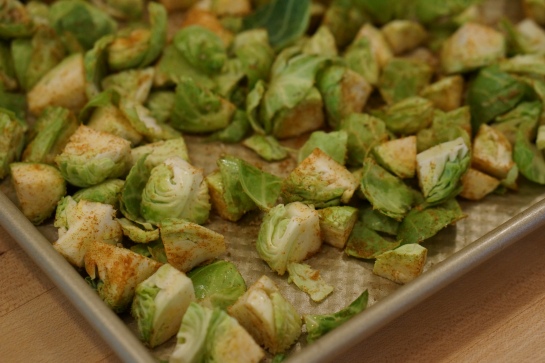
On a large baking tray, toss Brussels sprouts with cumin, salt, cayenne, mango powder and oil.  Bake for 15 minutes, carefully stirring them once after 6 minutes.  (The spices should be cooked and the Brussels sprouts slightly dry but not wilted.)  Remove from the oven and set aside.

Sour Cream Curry

In a medium bowl, combine sour cream and buttermilk.  Set aside.

Heat oil in a medium pot on medium-high for 45 seconds.  Add onion and sauté for 5 minutes, or until golden brown.  Add garlic and sauté for 2 to 3 minutes, or until garlic is also golden brown.  Stir in tomatoes, mustard seeds, cayenne, salt, garam masala (or cumin) and fenugreek seeds and sauté for 5 minutes, or until oil glistens on top.  Stir water and bring to a boil.  Reduce the heat to low and simmer for 5 minutes.

To prevent curdling, spoon about 3 Tbsp of the hot curry into the sour cream-buttermilk mixture.  Stir well, then pour the sour cream-buttermilk mixture into the pot of curry.  Using a whisk, mix well and simmer, stirring continuously, for 5 minutes, or until the curry reaches a gentle boil.  Remove from the heat.

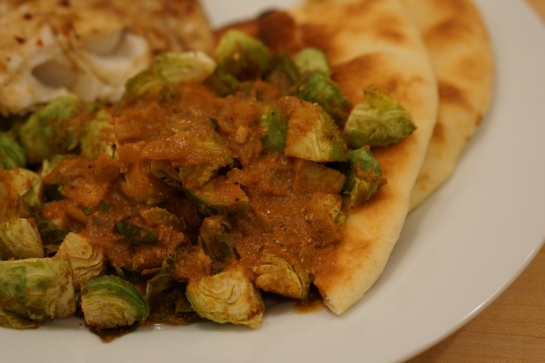
Top baked Brussels sprouts with sour cream curry and serve immediately.

*Serve this dish with bread or on top of a 2-inch cube of paneer per serving.

Warm and Crusty Date Pudding

Recipe courtesy of Tyler Florence

YUMMMM!  What more can I say?!  I made this dessert for a dinner party that I hosted and it was unanimously a hit!  It’s a fairly easy dessert that will warm people’s tummies and satisfy their chocolate craving.  You can make this in one large soufflé dish or in individual ramekins like I did.

SERVES 8

Ingredients

  • 2 cups pitted dates (6 ounces)
  • 1 1/4 cup granulated sugar
  • 1 tablespoon pure vanilla extract
  • 1/4 heavy cream
  • 4 ounces semisweet chocolate, chopped into pieces
  • 1/2 cup unsweetened cocoa powder
  • 1/4 cup all-purpose flour
  • 6 large egg whites
  • Confectioners’ sugar, for garnish

Directions

Preheat the oven to 375ªF and adjust the oven rack to the middle position.  Coat a 1 1/2 quart soufflé dish or eight 6-ounce ramekins with nonstick spray.

Place the dates in a saucepan and add 3/4 cup water.  Bring to a simmer and cook over medium-low heat for 10 minutes, or until the dates are very soft and the water is mostly evaporated.  Transfer to a food processor and puree until smooth.  Add the granulated sugar and vanilla and process until well blended.  Scrape into a large mixing bowl.

Rinse out the saucepan and add the cream.  Bring to a simmer, then remove the pan from the heat, add the chocolate, and stir until melted.  Pour the chocolate into the date mixture and stir until smooth.  Sift together the cocoa powder and flour.  Fold into the chocolate-date mixture with a rubber spatula until well mixed.  In a separate bowl, use an electric mixer to beat the egg whites until they form stiff peaks.  Gently fold them into the date mixture until just combined.

Pour the batter into the prepared dish or ramekins and smooth the top with a spatula.  If using ramekins, set them on a rimmed baking sheet.  Bake the ramekins for 20 to 25 minutes, the soufflé dish for 25 to 30 minutes, or until the outside of the pudding is set and crusty looking.  Cool until the pudding is just warm, and serve with confectioners’ sugar sifted on top.

Grilled Snapper with Mango-Avocado Salsa

Serves 4

This recipe is derived from the one and only Gwyneth Paltrow however she uses halibut in her recipe but because I don’t care for halibut, I’ve substituted it with red snapper and I’ve also modified the cooking technique such that I use a grill pan rather than the BBQ.  I don’t own a gas BBQ, only a charcoal Weber, and although I love the taste, it’s just not as convenient for a simple recipe like this…hence why I use the grill pan!  This is a super easy recipe and quite healthy.

Ingredients

  • 1 medium ripe avocado, peeled and cut into 1/2″ dice
  • 1 medium ripe mango, peeled and cut into 1/2″ dice
  • 1 cup cherry tomatoes, quartered
  • 4 large fresh basil leaves, thinly sliced
  • 3 tablespoons extra-virgin olive oil, divided, plus more for brushing
  • 3 tablespoons fresh lime juice, divided
  • Kosher salt and freshly ground black pepper
  • 4 6-ounce red snapper fillets
  • 4 lime wedges

Preparation

  • Gently combine the avocado, mango, tomatoes, basil, 1 tablespoon oil, and 1 tablespoon lime juice in a large mixing bowl. Season salsa to taste with salt and pepper and set aside at room temperature, gently tossing occasionally.
  • Place fish fillets in a 13x9x2″ glass baking dish. Drizzle remaining 2 tablespoon oil and 2 tablespoon lime juice over. Season fish with salt and pepper. Let marinate at room temperature for 10 minutes, turning fish occasionally.
  • Prepare a grill pan on med-high heat. Grill fish until just opaque in center, about 3 minutes per side. Transfer to plates. Spoon mango-avocado salsa over fish. Squeeze a lime wedge over each and serve.